Jupyter
from IPython.display import clear_output

from IPython.core.display import display, HTML
display(HTML("<style>.container { width:100% !important; }</style>"))

import warnings
warnings.filterwarnings('ignore')

import sys; sys.argv=['']; del sys
parser.add_argument(....)
Installation
## Basic

pip install jupyter
conda install -y ipython jupyter

## Jupyter Lab설치
# you will need jupyter notebook >= v4.2
pip3 install jupyterlab
jupyter serverextension enable --py jupyterlab --sys-prefix
jupyter lab

## Jupyter Extension설치
conda install nb_conda -c conda-forge
# conda install nb_conda
# conda install -c anaconda-nb-extensions nbpresent
# conda install -c conda-forge jupyter_contrib_nbextensions

pip install https://github.com/ipython-contrib/jupyter_contrib_nbextensions/tarball/master

jupyter contrib nbextension install --user
도커 이미지 : Creating a Docker image for Jupyter + Octave: Octave, Julia, R, Python3
TIP
1. jupyter-tensorboard
주피터 노트북에서 tensorboard를 바로 킬 수 있게 해줍니다.
설치
1. Be sure that tensorflow(-gpu)>=1.3.0 has been installed.
2. Install the pip package: pip(3) install jupyter-tensorboard
실행
1. jupyter로 logdir로 이동한다.
2. new - tensorboard
3. 자동으로 실행되거나 run에 가면 실행시킨 tensorboard로 이동할 수 있습니다.
2. Ignore warning
import warnings
warnings.filterwarnings('ignore')
3. argv in Jupyter
BASE_DIR = os.path.dirname(os.path.abspath(__file__)) # __file__에 따옴표

import sys; sys.argv=['']; del sys
parser.add_argument(....)
4. Print All Values
np.set_printoptions(threshold=np.inf)
print(batch_data)
np.set_printoptions(threshold=1000)
5. 넓은 화면에서 보기
from IPython.core.display import display, HTML
display(HTML("<style>.container { width:100% !important; }</style>"))
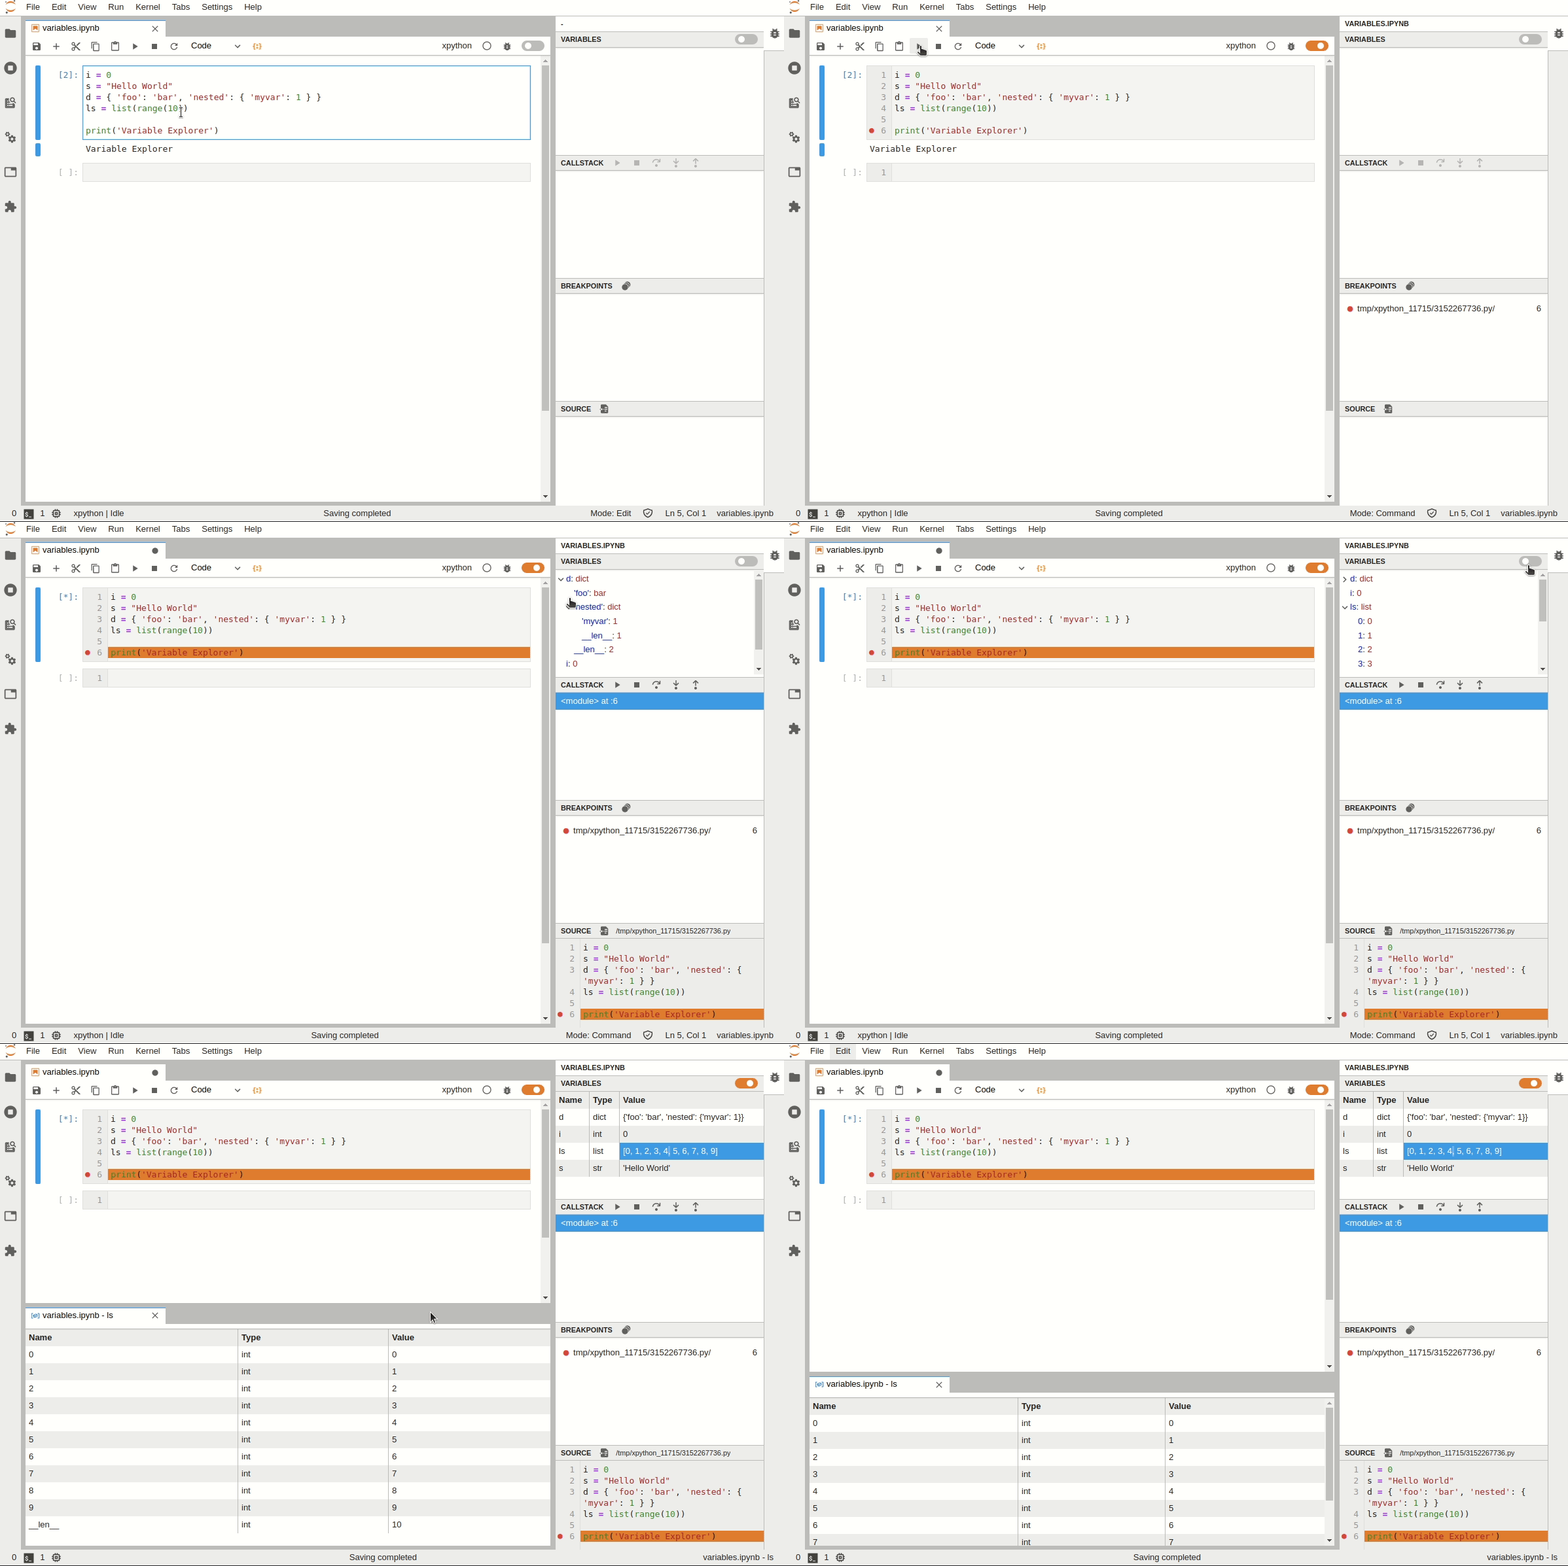
6. 쥬피터로 디버깅 하기

부팅시 자동 실행 : 중간 부분
슬라이드로 만들기
- View → Cell Toolbar → Slideshow
- jupyter nbconvert Jupyter Slides.ipynb --to slides --post serve
Configuration
mkdir ~/.jupyter && cd ~/.jupyter
wget https://gist.githubusercontent.com/adioshun/383e4f722712e94dcc9a5d8c9fda2bf4/raw/bbd7d9a23af2af47cd518261c74ef10a2c304ccd/jupyter_notebook_config.py


jupyter notebook --generate-config --allow-root
vi /root/.jupyter/jupyter_notebook_config.py
jupyter_notebook_config.py 설정파일
# -*- coding: utf-8 -*-

c.NotebookApp.ip = '0.0.0.0'  #L158
c.NotebookApp.open_browser = False # L201 원격접속으로 활용할 것이기 때문에 비활성화 시켰다.
c.NotebookApp.port = 8888 # L213 포트를 설정해준다. 기본포트로 8888이 자동 배정된다.
c.NotebookApp.password = 'sha1:a8dee43a3a44:b18f1ad149a60efb4838da44cf127985d64a5e70' # L210 python 실행후 from notebook.auth import passwd; passwd\(\)
# c.NotebookApp.password = 'sha1:a4a97a70ed7c:a554dcc8f9c76c44129cb9bce3d954a6d8bfc1ae' #snu2018
# c.NotebookApp.password = 'sha1:834d30a0973a:3ff75a3b19f0aa52bf6402eb8778b7fa6da04537' #ubuntu

c.NotebookApp.notebook_dir = '/workspace' # L195 기본 디렉터리를 지정시켜준다.
실행:jupyter notebook --allow-root
Jupyter 다중커널설정
기존 Jupyter에 새 커널 추가 하기 (conda사용시)
jupyter kernelspec list
source activate py2torch
python -m ipykernel install --user --name py2torch --display-name "Python2(pytorch)"
# conda2 OR 3 install

conda create -n pyton3 python=3 ipykernel

jupyter kernelspec list #설치된 커널 확인
pip3 install notebook ipykernel
#conda install notebook ipykernel
ipython kernel install --user
또는
python2 -m pip install ipykernel
python2 -m ipykernel install --user
2. Python 용 R 설치 (/w conda)
conda install -c r r-irkernel
conda install -c r r-essentials
ipython에서 R 패지키 설치 방법 (R 콘솔에서 실행??)
sudo apt-get install libcurl4-openssl-dev
sudo apt-get install libssl-dev
#R쉘진입
install.packages(c('repr', 'IRdisplay', 'evaluate', 'crayon', 'pbdZMQ', 'devtools', 'uuid', 'digest'))
devtools::install_github('IRkernel/IRkernel')
IRkernel::installspec()
패키지설치시: install.packages("ldavis", "/home/user/anaconda3/lib/R/library")
메뉴얼필독
3. C++용 Jupyter
#include <iostream>
std::cout << "some output" << std::endl;
3.1 소스 설치 (ubuntu 16기준)
https://askubuntu.com/questions/899313/how-to-install-cling-kernel-in-jupyter-notebook [Download]
# 기존 커널 삭제
~/cling_2017-03-30_ubuntu16/share/cling/Jupyter/kernel
jupyter kernelspec uninstall cling-cpp11

# 새로 설치
mkdir -p ~/builds && cd ~/builds
wget https://root.cern.ch/download/cling/cling_2018-11-05_sources.tar.bz2
tar jxf cling_2018-11-05_sources.tar.bz2
mv src cling_2018-11-05
mkdir -p ~/builds/cling_2018-11-05/build
cd ~/builds/cling_2018-11-05/build
cmake -DCMAKE_BUILD_TYPE=Release ../
make -j8
sudo make install
sudo ldconfig
cd /usr/local/share/cling/Jupyter/kernel
sud pip3 install -e .
sudo jupyer kernelspec install cling-cpp11
cd ~ && jupyter notebook
3.2 바이너리 설치
zeromq설치
$ sudo apt install zeromq #ubuntu 16
#$ sudo apt instal libzmq3-dev
$ wget https://gist.githubusercontent.com/katopz/8b766a5cb0ca96c816658e9407e83d00/raw/bc93fda1fe2fe5c6f45648ba131596134d92f7dc/setup-zeromq.sh
cling 설치
# https://root.cern.ch/download/cling/cling_2020-03-11_ubuntu18.tar.bz2
$ tar xvf cling_2020-03-11_ubuntu18.tar.bz2
$ cd cling_2020-03-11_ubuntu18/share/cling/Jupyter/kernel/
$ pip3 install -e .
$ jupyter-kernelspec install --user cling-cpp17
$ vi ~/.bashrc -> `PATH=/home/adioshun/cling_2020-03-11_ubuntu18/bin:$PATH
$ source ~/.bashrc
3.3 Conda 설치
https://xeus-cling.readthedocs.io/en/latest/installation.html#from-source-with-cmake
conda create -n cling
source activate cling
conda install xeus-cling notebook -c QuantStack -c conda-forge